Common Painting Mistakes
10 Common Painting Mistakes (And How To Avoid Them)
When it comes time to tackle your home’s interior or exterior paint job, the task can seem deceptively simple, which causes many of us to make mistakes that tend to be easily avoidable. By reading on to learn more about the most common mistakes that are made during the painting process, you can find out how to avoid them and steer clear of errors that will add more time to the task at hand and lead to higher expenses over the long haul.
1. Lack of Prep Work
House painting is one of those rare tasks that would seem to require very little prep work, but unfortunately for all of the overzealous home improvement gurus out there, there are a number of preparation steps that need to be taken. If you’d like to avoid unsightly splatters and drips, be sure to cover all of the areas you’d like to keep clean with drop cloths. Doorknobs should be wrapped in plastic and the edges of your trim can be covered in tape for safe keeping. The covers for your switches and outlets must also be removed. Cover light fixtures, baseboards, floors, receptacles and switches with masking tape. Fill all drywall holes with compound. Caulk all baseboards and trim. Sand all repair work. Prime all repair work.
2. Using The Wrong Tape
When covering sensitive areas with tape, homeowners often fall into the trap of believing that any old tape will do, which causes them to rely on faulty electrical or masking tape as a result. If you want clean, crisp edges and a polished finish, you’ll need to use painter’s tape to tightly seal windows and baseboards before you begin. It is also important to remove the painter’s tape before the paint has a chance to dry, to keep any dried paint from potentially peeling off.
3. Failure To Clean The Area
Whether you are painting the walls inside of your home or you are planning on touching up the home’s exterior, you will need to thoroughly wash the area first. If you have ever been in a home that had hair or dust particles stuck to its walls, this is the product of a failure to clean beforehand. Failure to clean the area you are painting will also serve to give the final paint job an unsightly, rippled appearance.
4. Lack of Paint
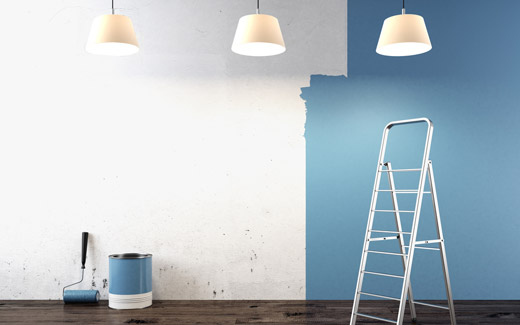 Having to stop a project in the middle and head to the hardware store while you are covered in paint is far from ideal and when you do not take the time to consider how much paint you will need for the task at hand, this can become problematic. Be sure to make the proper measurements and remember that each gallon of paint that you purchase is able to cover about 400 square feet before proceeding.
5. Selecting The Wrong Paint
You might have a few cans of old paint in your garage that you want to burn off by taking on a new project, but that does not mean that this is the right paint to be using. If you have any questions at all about whether the paint that you have is correct for the job that you plan to take on, head down to your local hardware store’s paint department and ask one of the experts if it is the right choice for your needs.
6. Forgetting The Primer
While some may feel as if primer is not truly necessary, this is a step that cannot be skipped for any reason. By adding primer to the surface you are planning on painting, you are making it much easier for the paint to adhere. Primer is also helpful when it comes to making sure that the color you have selected is able to stand out. You are also able to purchase a number of paint/primer combos, so there is no reason to skip this crucial step of the process.
7. Incorrect Paintbrush & Tools
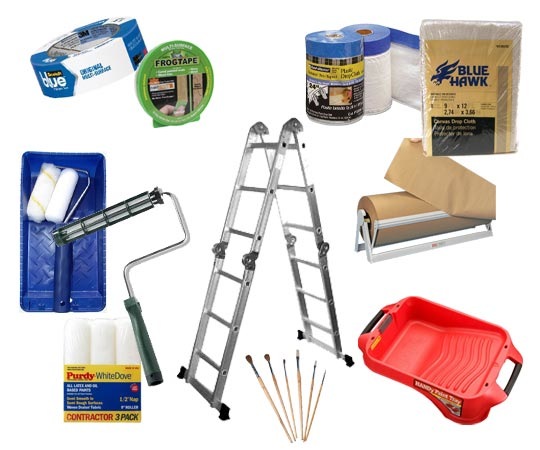
You will always need a nine inch roller, a roller handle, a rolling pole, a ladder, a painters pan, and two or more paint brushes. Paintbrushes are not one size fits all and you will need to select the one that is just right for your project. If your project is being completed with latex paint, you’ll need to purchase a paintbrush that has synthetic bristles. On the other hand, a project that requires oil based paint will require a brush with natural bristles. You get what you pay for, so don’t be shy about shelling out a little extra for quality brushes.
8. No Consideration For The Elements
Don’t make the mistake of assuming that the elements are going to cooperate with you just because you’ve cleared a weekend of your schedule. For exterior painting projects, it is important to consider the humidity levels before you begin, as higher levels will lead to slower drying times. If the humidity levels are projected to rise come painting day, it might be in your best interests to hold off for a little while.
9. Improper Dipping Tactics
A first time painter may use too much paint, or not enough on their paint brush. This will either cause runs and drips on your walls or a third and unnecessary coat of paint to get the job done. To get the best results while painting, it is not necessary to dunk your paintbrush all the way down into the can itself. Simply dip the brush you are using a third of the way into the can, as this technique not only allows you to maximize the amount of paint you have, but also keeps you from experiencing unwanted drippings.
10. Adding a Second Coat Too Early
Sometimes, we can get too eager when it comes to completing our painting projects, which causes us to add a second coat of paint before the first one has had the chance to properly dry. Adding a second coat too quickly can lead to a host of problems, including visible brush strokes and excessive peeling. Follow the instructions on your can of paint to the letter in order to avoid such difficulties.
